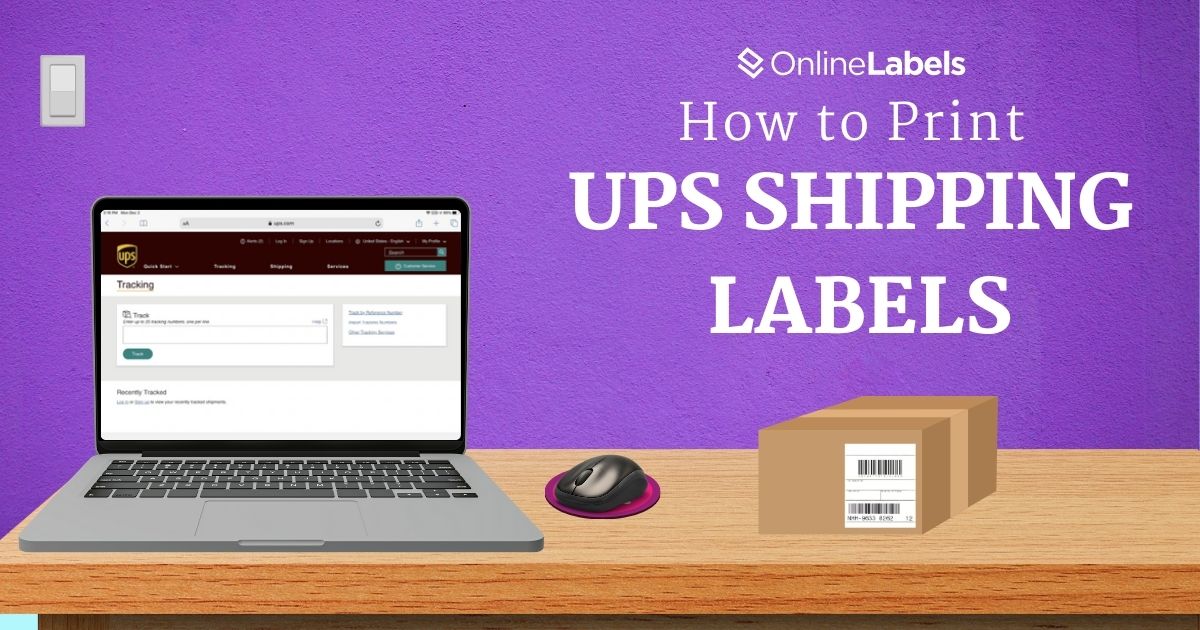
How to Print UPS Shipping Labels


Becoming proficient with the United Parcel Services (UPS) platform significantly increases a company’s delivery efficiency and guarantees a smooth production of shipping labels. This guide provides six easy steps for UPS you can use to create shipping labels, ensuring businesses can optimize their logistics operations and meet customers’ expectations.
Why Print UPS Shipping Labels From Home
Printing shipping labels from home is a cost-effective and time-saving solution for small and large businesses. With just a home printer and blank labels, you can create quality labels for your shipping needs. Some of the advantages of printing shipping labels from home include:
- Print labels instantly: home printers and stock of blank shipping labels can be useful for busy periods like holidays or sales when quick turnaround is essential.
- Instant label generation and tracking: once printed, your UPS label comes with an active tracking number, which you and your customers can use.
- Access discounted UPS shipping rates: when you purchase and print UPS labels through the online platform, you can get access to lower rates than you’d pay in store or through a provider.
Inkjet vs. Laser vs. Thermal for Shipping Labels
When printing shipping labels from home, your choice of printer can significantly impact your workflow, label quality, and long-term costs. Here are a few benefits that inkjet, laser, and thermal printers offer and how each can help smooth the shipping process.
Inkjet Printers
This type of printer is a common choice for home users because it uses liquid ink to produce crisp text and images, which is helpful if you’re printing branded or color labels.
Pros
- Great for custom labels that include logos, colors, or branding.
- Good option for low-volume shipping or occasional label needs.
- Can work with a variety of label materials that are used for shipping labels, including matte and gloss.
Cons
- Ink smudges easily, especially on glossy materials or if exposed to moisture.
- It has a lower printing speed, which can slow order fulfillment.
- Higher cost per label due to frequent ink cartridge replacements.
Laser Printers
Laser printers use toner (powder-based) instead of ink, which makes the labels more resistant to smudging and ideal for fast-paced shipping environments. They’re known for their fast speed and for their flexibility with black-and-white shipping labels.
Pros
- Enhanced speed with better results
- Resistant to smudging
- Lower cost per label over time
Cons
- Higher initial cost
- Images and detailed graphics may not print as well
- Toner cartridges can be very costly to replace
Thermal Printers
Thermal printers are specifically designed for label printing. They use heat to print directly onto thermal labels, no ink or toner required, making them the most efficient option for frequent shippers.
Pros
- No need for ink or toners
- Useful for fast, high-volume label printing
- They can produce sharp and scannable barcodes
Cons
- Can only print in black (unless using specialized labels).
- Requires thermal label rolls
- Higher upfront cost than basic inkjets
6 Easy Steps to Print Shipping Labels with UPS
UPS is a popular shipping carrier option for businesses and offers a variety of delivery options like air freight and expedited shipping. While USPS only provides mail and package services to the United States, UPS offers a more global range of shipping and logistic services. However, the steps to print a label on UPS are very similar to the ones on USPS and are as follows:
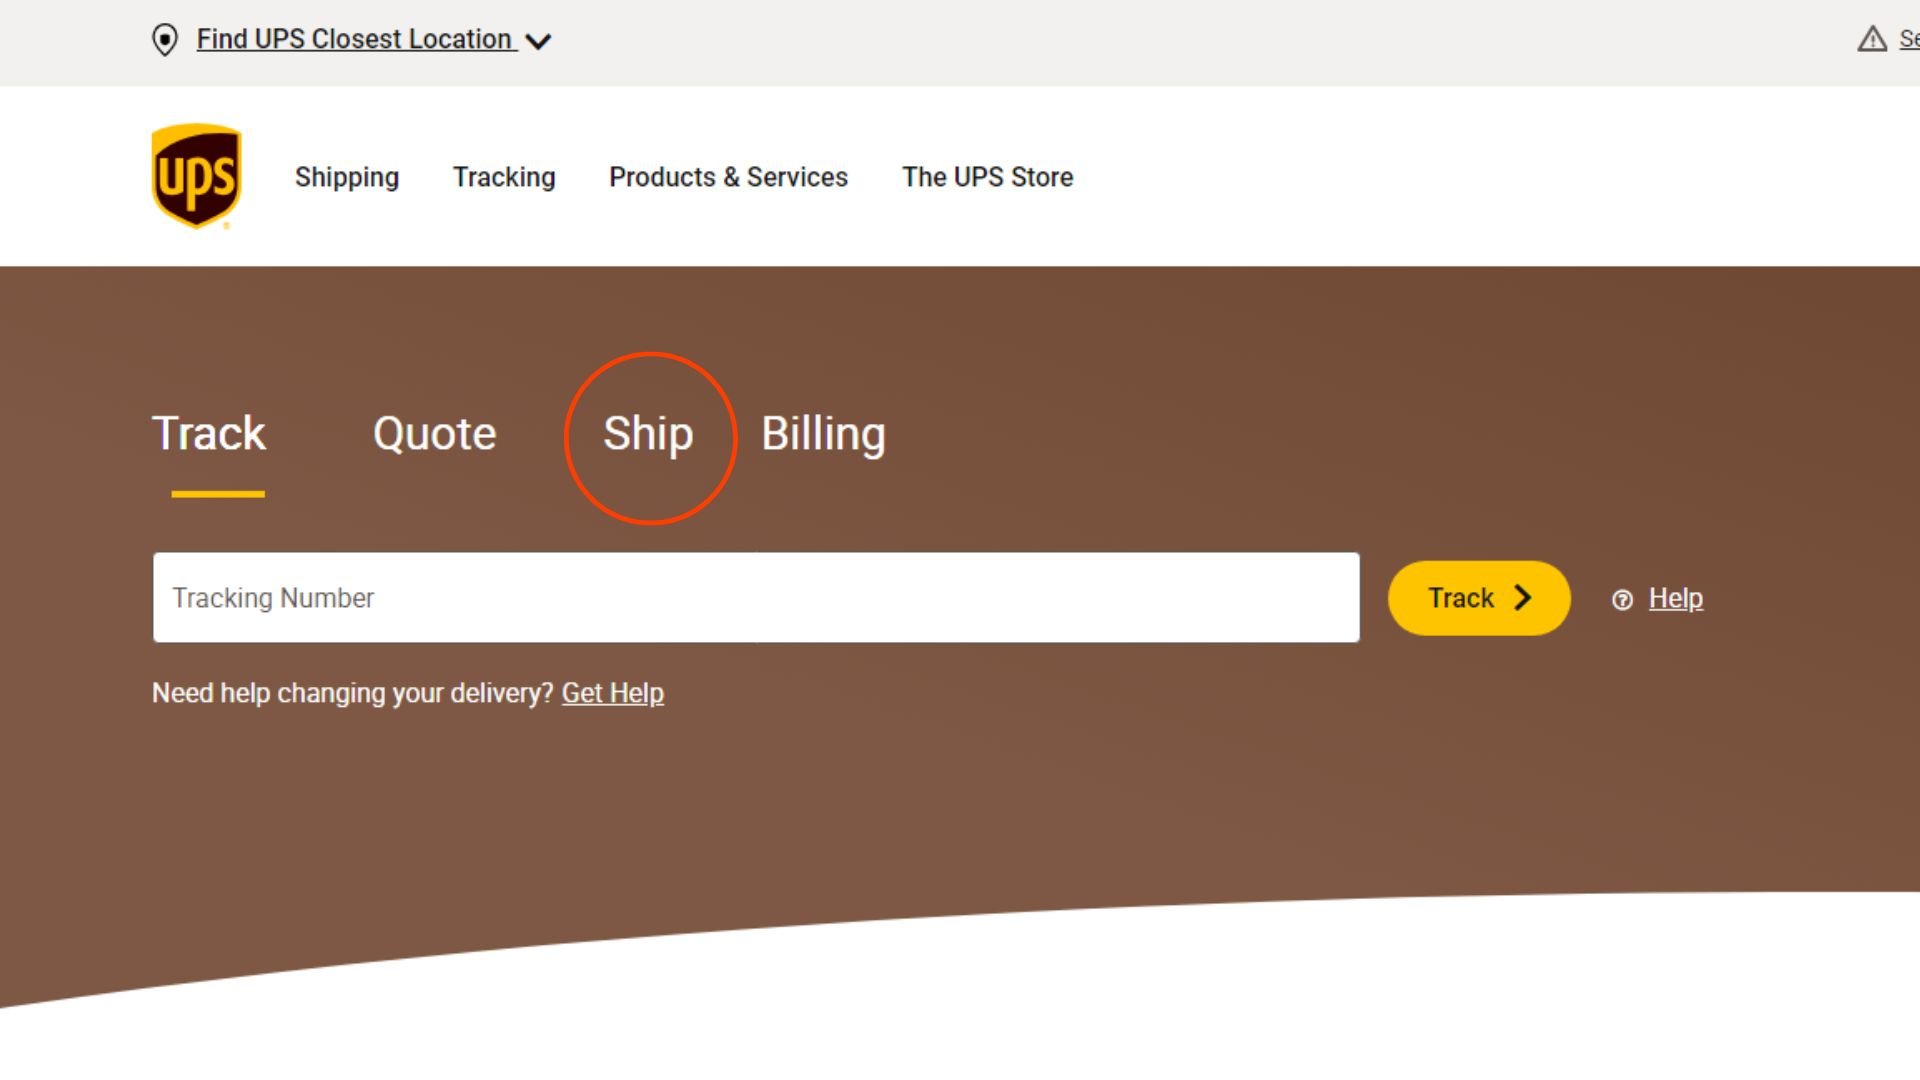
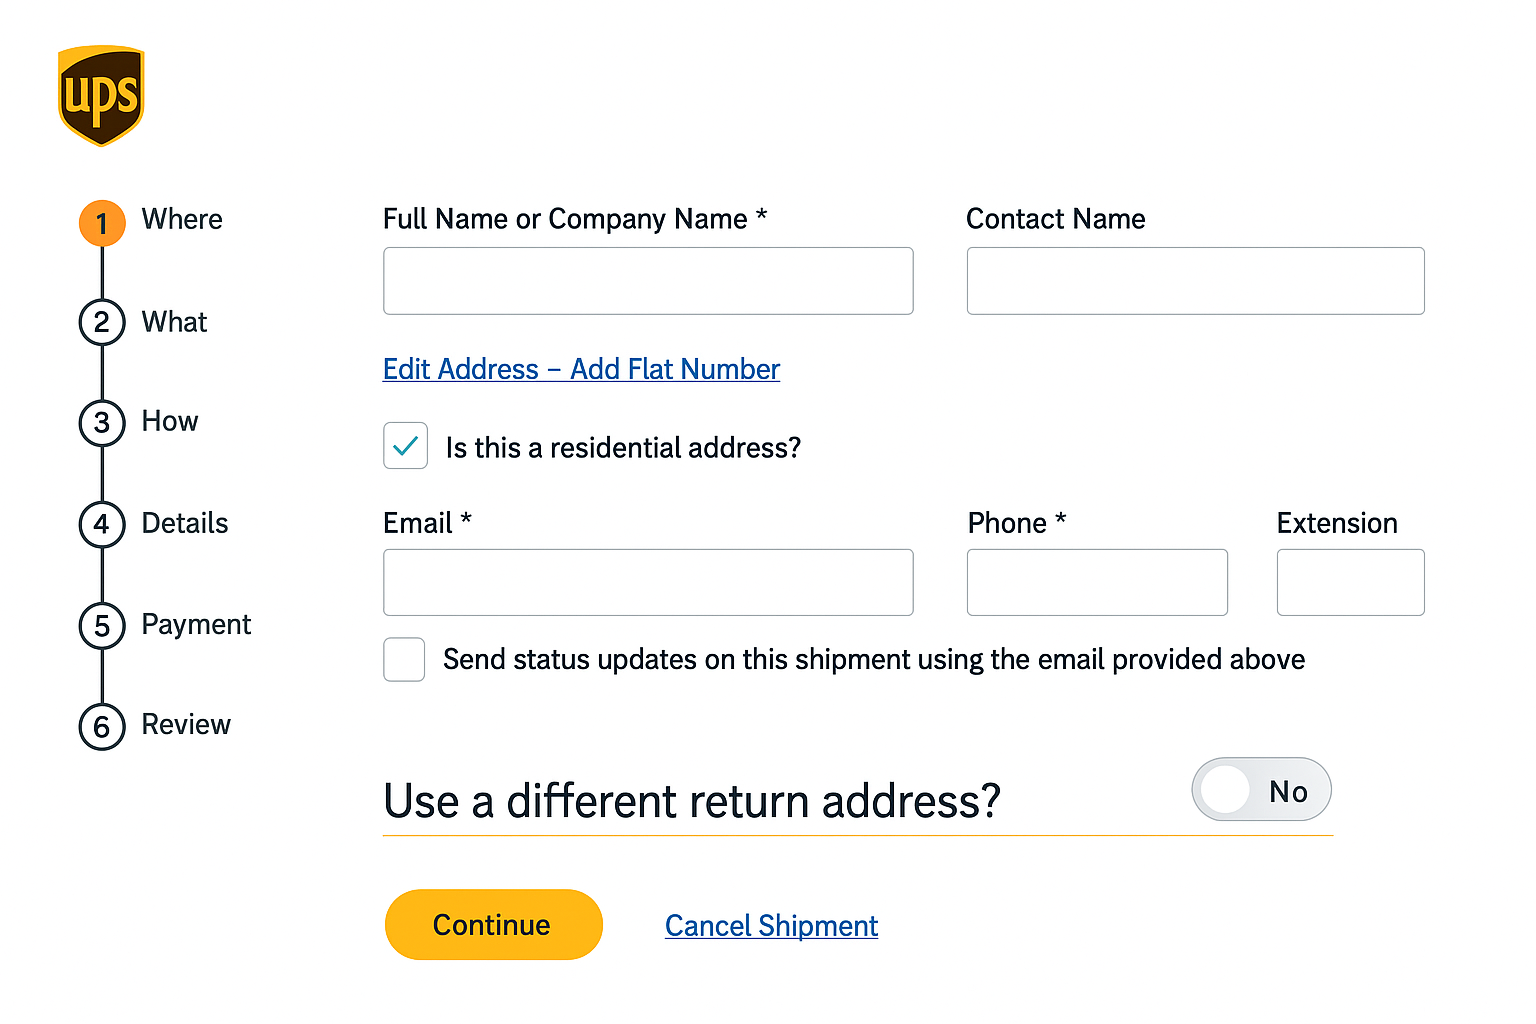
- Go to ups.com using an existing account or log in as a guest. Then click Ship on the middle left side of the screen.
- The first tab will ask for the country where you want the parcel to be sent. UPS can send items to Canada, Mexico, Europe, Asia, and some parts of Latin America.
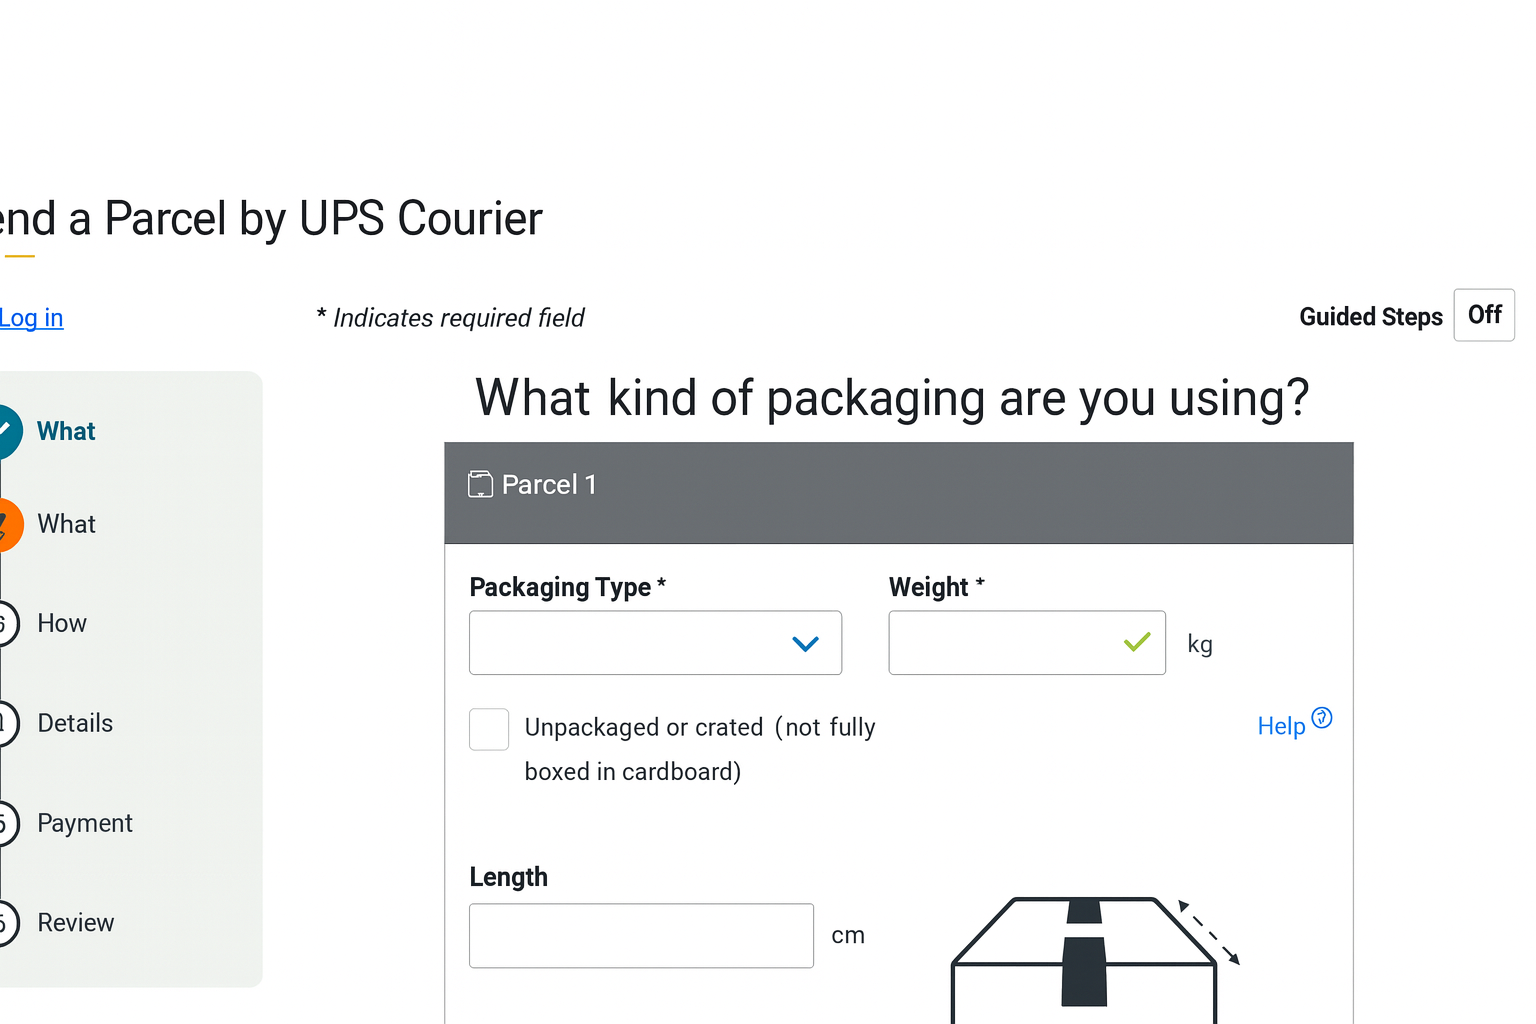
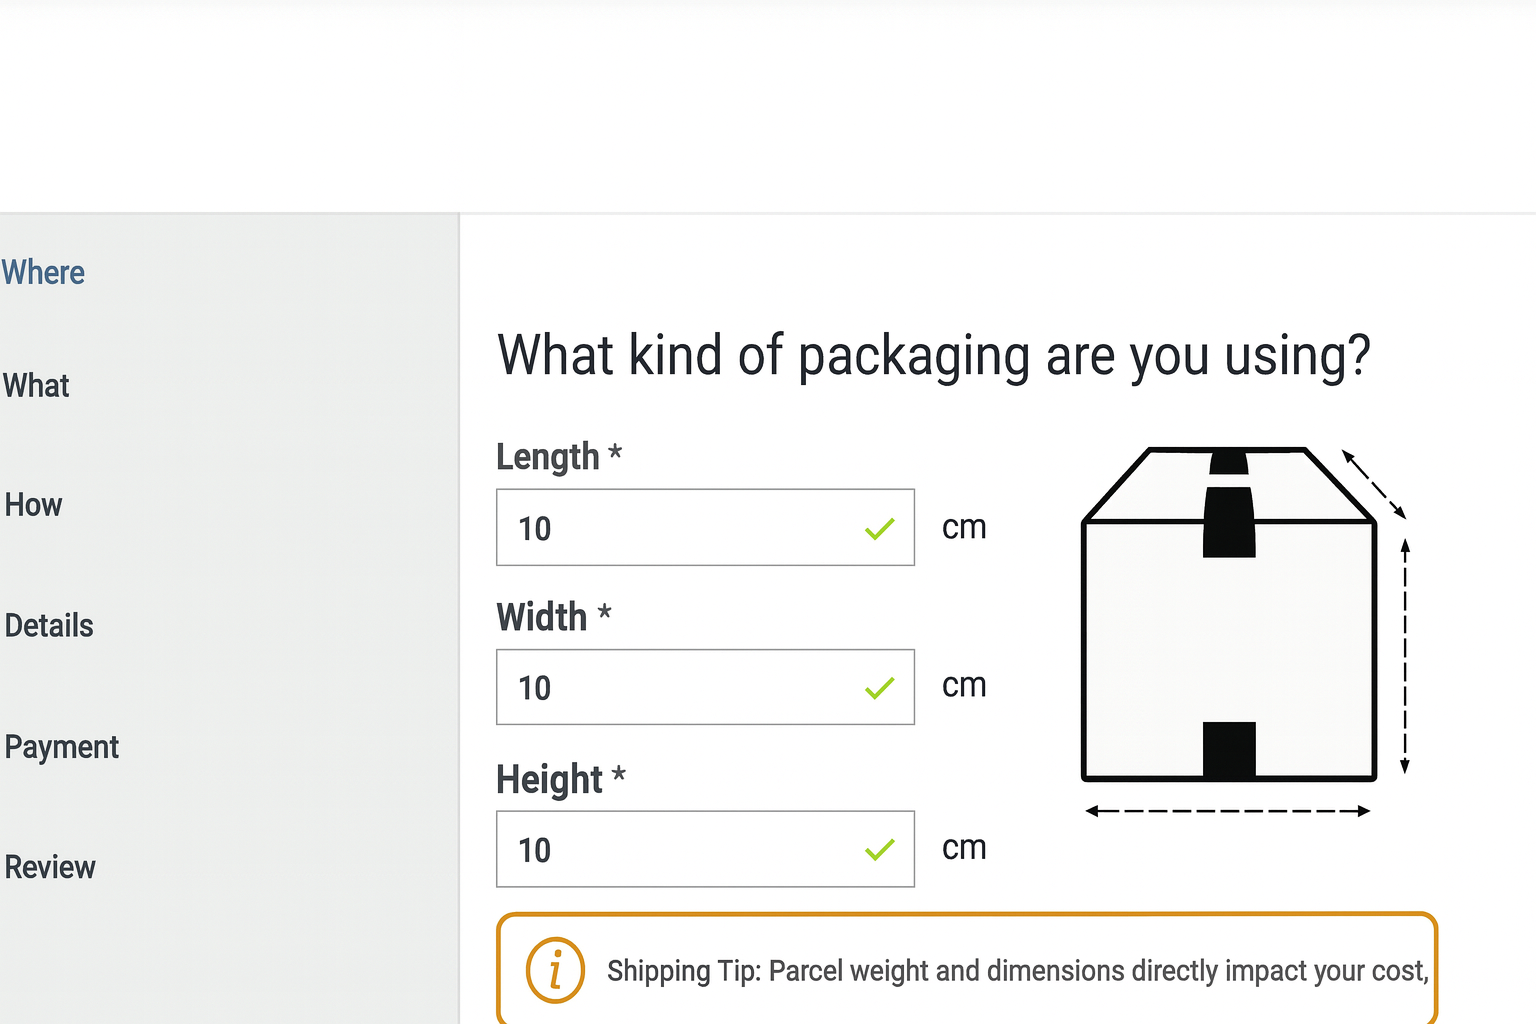
- The following section will ask to include the information relating to the package. In this case, include the weight and dimensions of the box. This will determine the final price of the label.
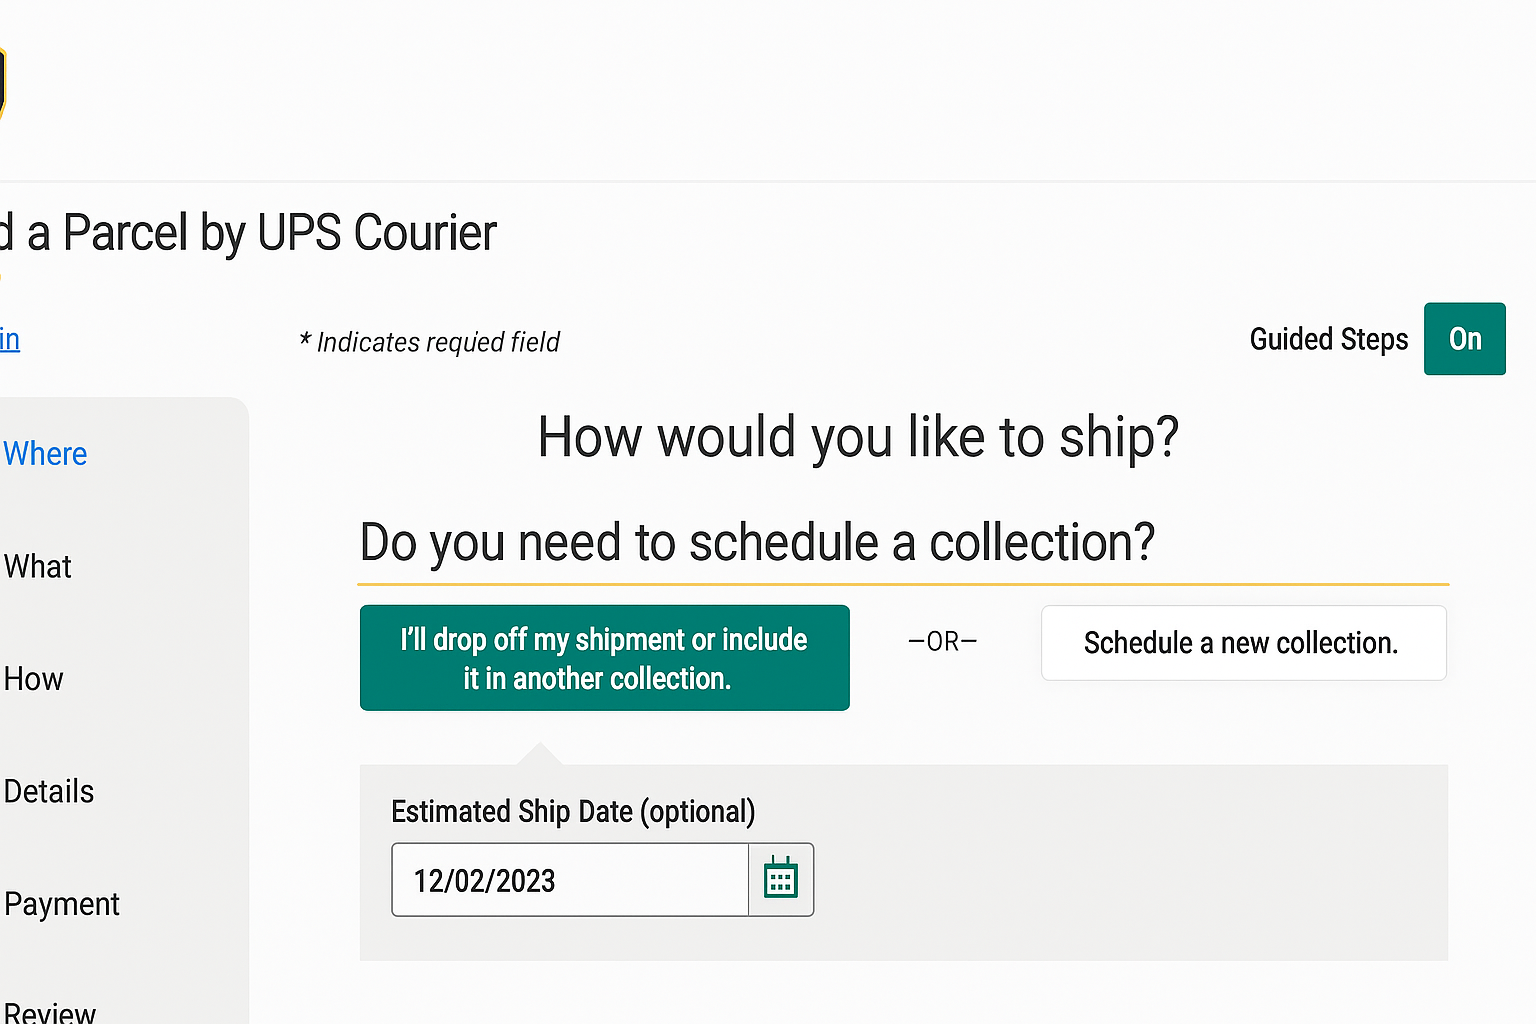
- You can choose an estimated ship date if the package needs to be picked up. Prices may vary depending on the date and the data submitted in Step 3.
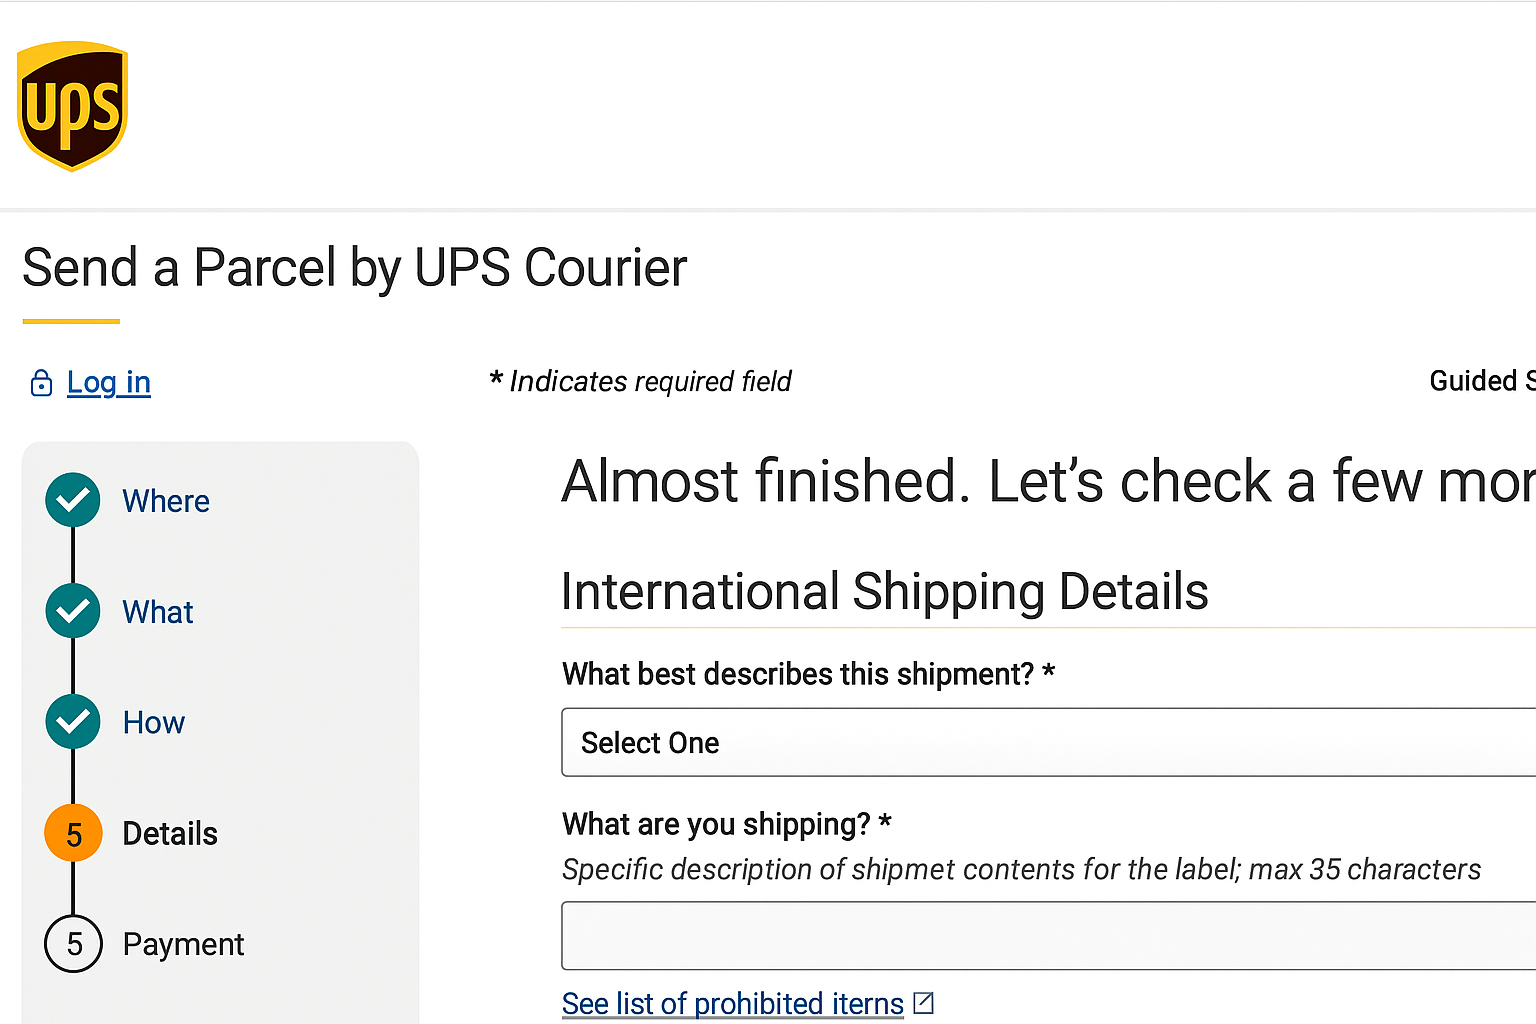
- The next step will ask you to describe the package. If you're shipping internationally, this part is the most important of the process as it prepares the correct export documentation for customs clearance.
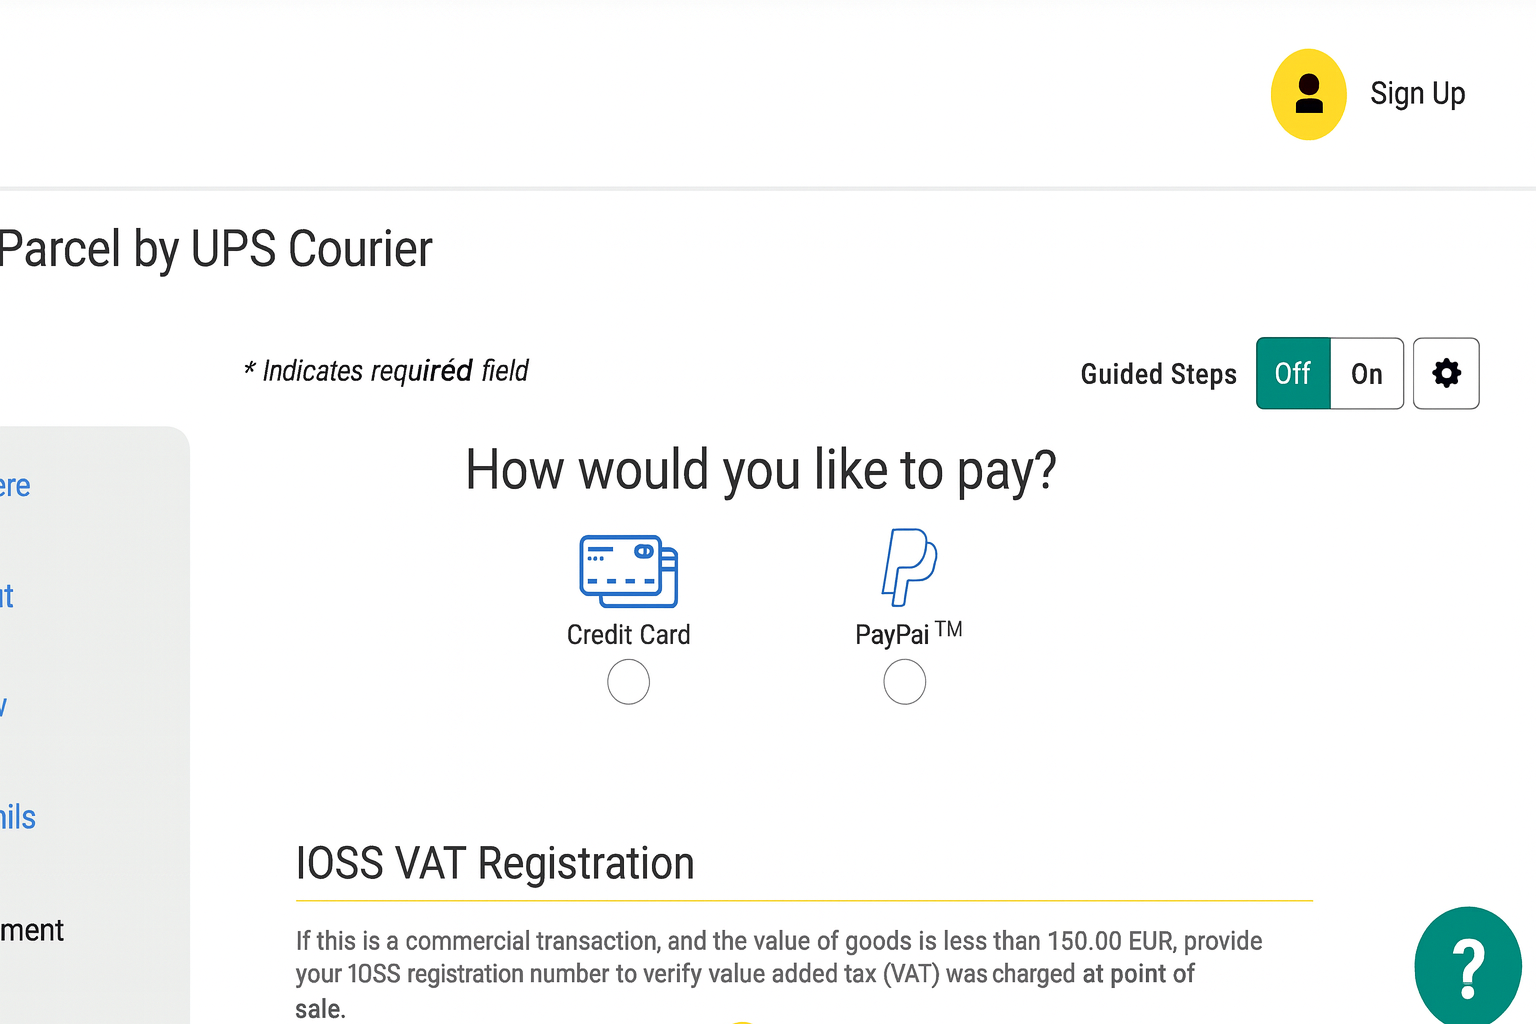
- After submitting the last details on the package, the page will transfer you to the payment section, taxes, and service fees. Prices vary according to the weight and distance of the package. UPS also includes an insurance option at the bottom of the page.
UPS also includes a Loss and Damage protection system, which allows you to recover the value of your product if it gets lost or damaged.

Once those steps are complete, you can review the shipping label and make any changes. After paying, the website will generate the label and prepare it for printing.
How to Set Up UPS Shipping Labels to Print
Whether you’re printing shipping labels from home or running a small business, knowing how to properly set up your printer for both standard letter-size paper (8.5” x 11”) and thermal labels (4”x 6”) is key to efficiency. Here’s a step-by-step guide for both printer types:
8.5" x 11" With Regular Printers
This step applies solely to inkjet and laser printers. To print in a standard home, follow these steps.
1. Open your shipping label file
Download the label from your shipping platform, in this case, UPS. Make sure it’s formatted for 8.5” x 11” paper, usually with two 4” x 6” labels per page or one label centered.
2. Insert the label sheet or paper into the printer
Load your blank label sheets into the paper tray. If you’re using regular paper and plan to tape the label, that works too.
3. Open your print dialog
Press Ctrl + P (Windows) or Cmd + P (Mac) to open the print settings window.
4. Set paper size to 8.5” x 11”
Make sure the paper size is set to “Letter” or 8.5” x 11” in your printer settings.
5. Select actual size - 100% scale
This ensures your labels print at the correct dimensions and remain scannable.
6. Print your label
Click print and allow the label to fully dry (especially if using inkjet) before applying it to your package.
How to Print 4” x 6” Shipping Labels With a Thermal Printer
1. Connect your thermal printer to your computer
Plug in via USB or connect via Wi-Fi, and install any required printer drivers.
2. Load your 4” x 6” thermal labels
Place the roll or fanfold labels into the thermal printers. Ensure thye’re aligned properly to feed straight.
3. Download and open your label
When purchasing shipping through platforms like UPS, select 4” x 6” label format at checkout or download.
4. Open your label file in your preferred viewer
Use Adobe Acrobat, your browser, or a thermal printer app to preview the file.
5. Set paper size to 4” x 6” in printer settings
In the print dialog, choose your thermal printer and confirm the paper size is set to 4” x 6”.
6. Set scale to 100% or actual size
This ensures the barcode and label fit perfectly on the label and remain scannable, and now your labels are ready to print.
Simplifying Shipping Every Step of the Way
United Parcel Services (UPS) stands out for its intuitive software, which facilitates printing shipping labels for orders. Understanding the tools available on this platform is crucial for businesses seeking to enhance their delivery efficiency and ensure customer satisfaction. UPS's diverse range of shipping services, from ground to expedited shipping, offers a comprehensive solution for domestic and international deliveries. By following the straightforward steps outlined above, users can optimize their shipping processes for success. For a full guide on how to print shipping labels, different printers available, and more delve into our article on how to print shipping labels!
